
Creating a Polygon in Google Earth
- You’ll need to download and install Google Earth. You can find the application here. Follow the directions for installation and open the program.
- Using your mouse or the search bar at the top left of the screen, locate your general area of interest on the Earth.
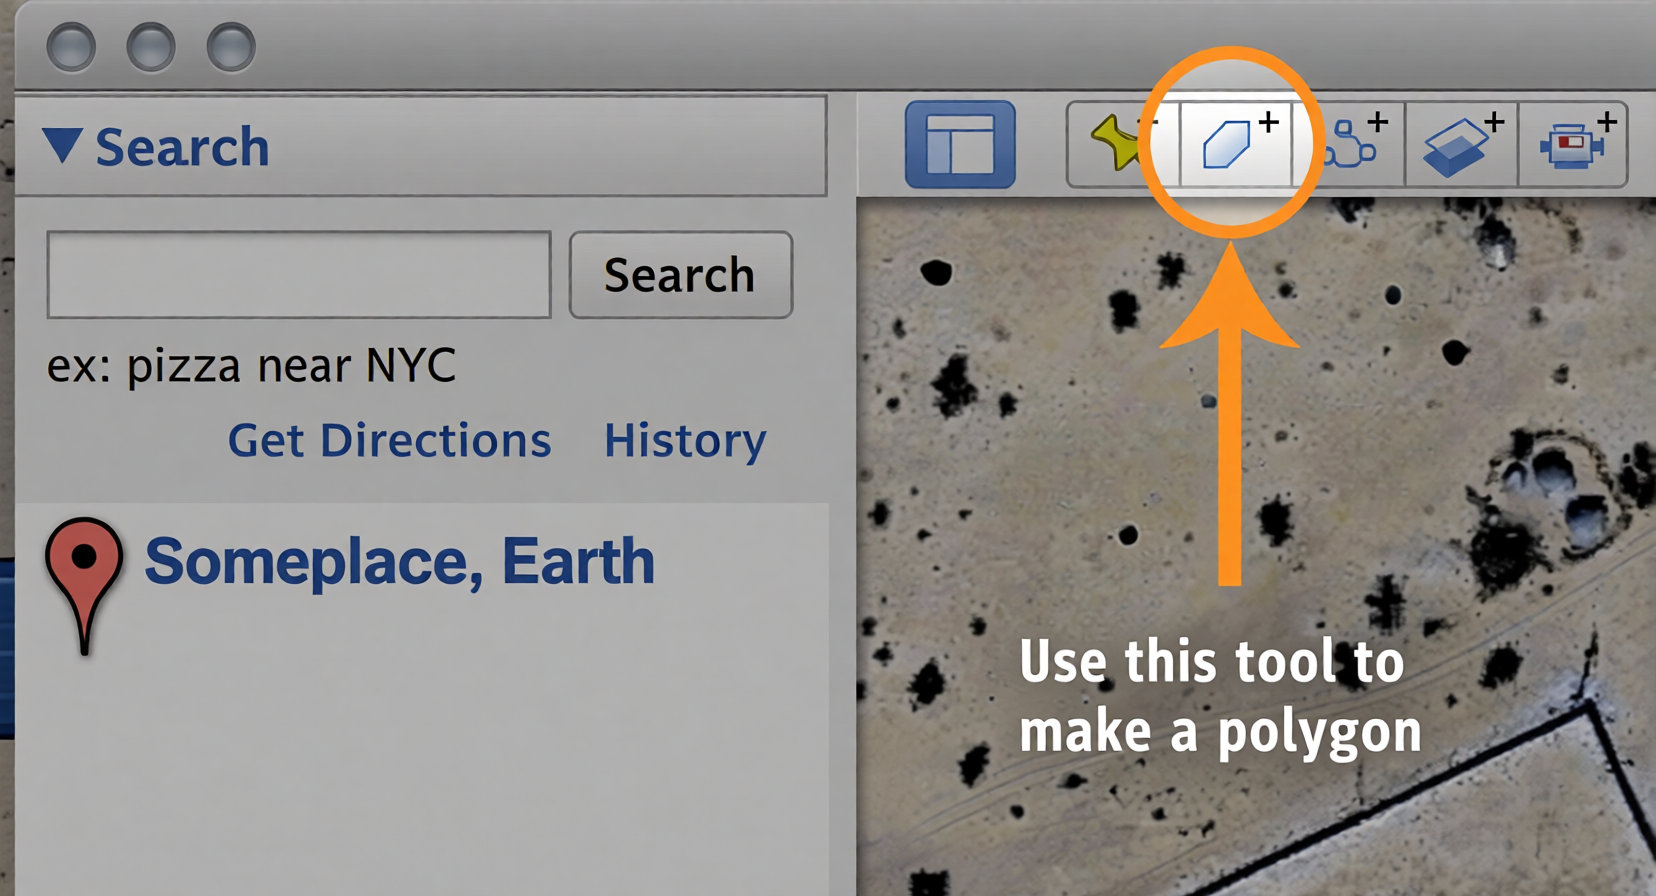
- Now that you’ve zoomed in to your area of interest, you’ll need to create a polygon. The third icon from the left at the very top of the screen will allow you you do to this. Go ahead, click on it!
- You’ll now see a popup window. Feel free to name your polygon, though it isn’t necessary for our purposes.
- For this next step, you may need to click and drag this popup window away from the map. Once you’re able to see your entire area of interest, while the popup box is still open, click on an outside point of your area of interest. Click again on another outer boundary of your area of interest, and continue doing this until the polygon completely covers the area.
- Now that you’ve done that, click “OK.”
- Your polygon will appear in the “Places” menu on the left side bar of the program.
- If you’re happy with your polygon, great, you’re ready to submit your area of interest to Apollo Mapping. If not, don’t worry, you can adjust the polygon by clicking on the points and dragging them to your desired location.
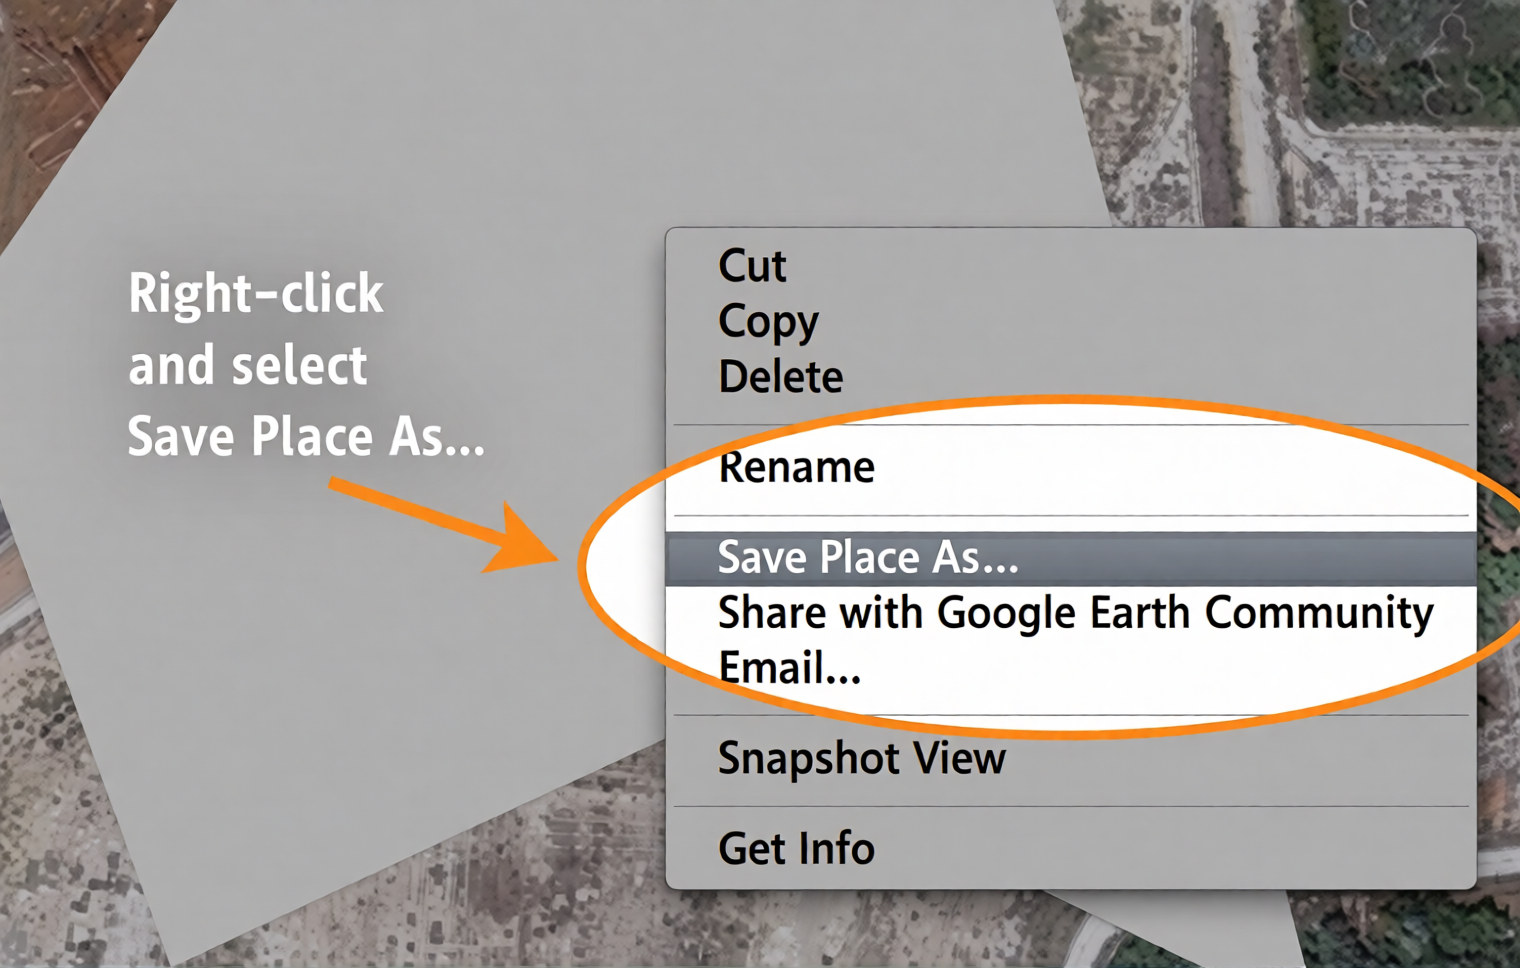
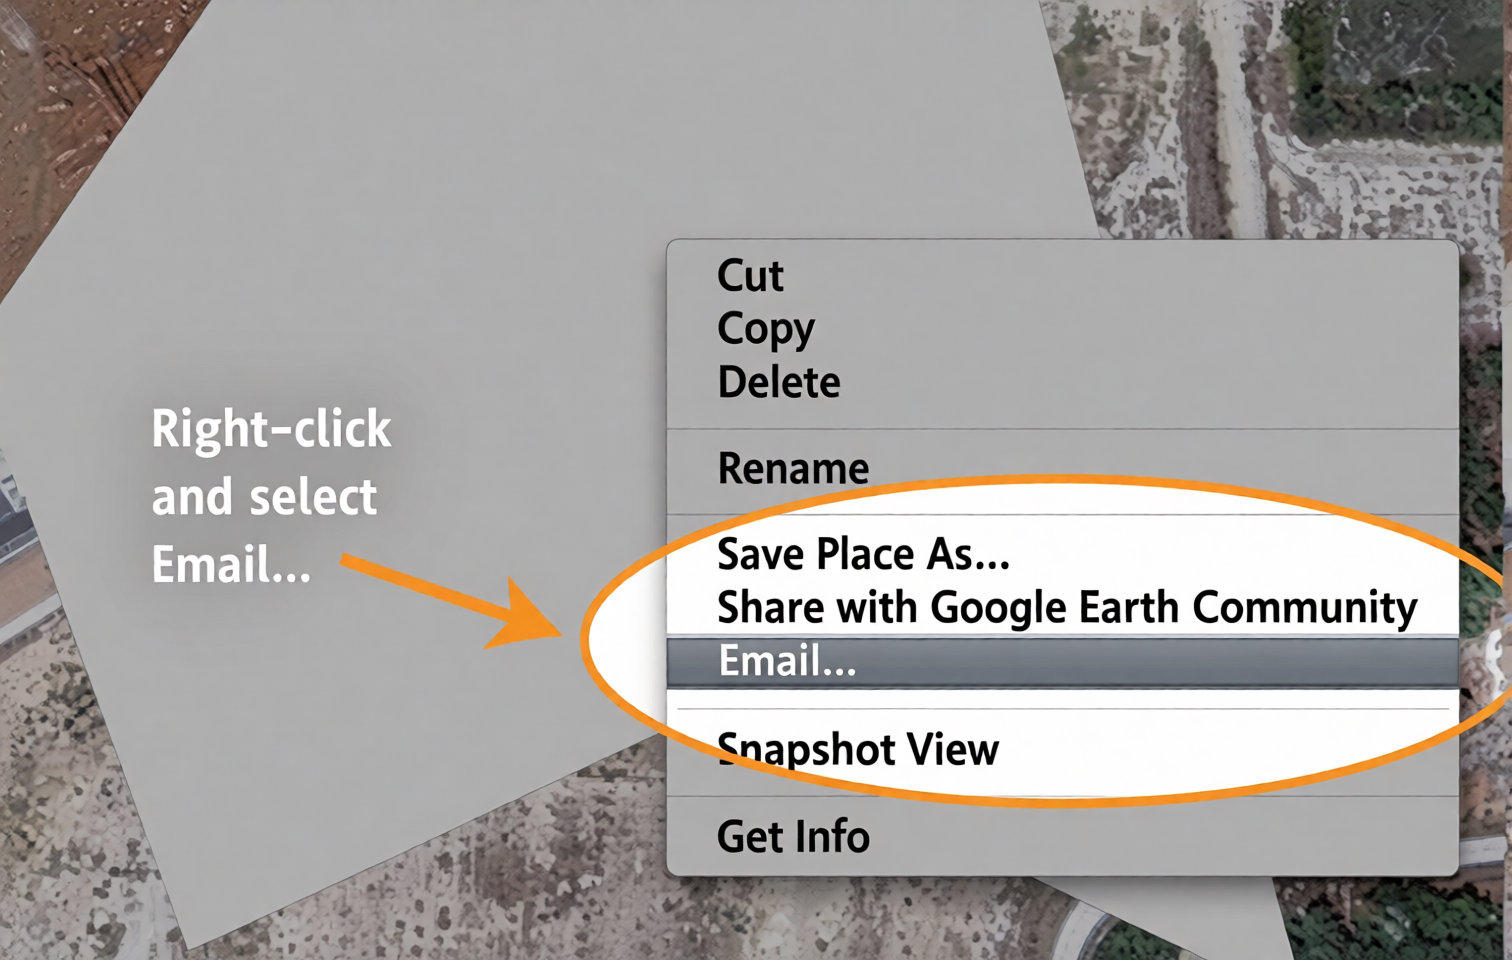
- Okay, now you should be ready to send us your polygon via email. You can do this two ways. If you have an email client like Outlook, Thunderbird or Apple Mail set up already, you can follow the second set of directions. If you do not have an email client set up and you use web-based email in a browser (e.g. using Firefox to access Gmail), please follow the first set of directions.